If you have damaged walls or want to get rid of textured surfaces in your home then a skim coat is the perfect solution.
A professional plaster is going to cost you money, so it is helpful to know how to skim coat a wall as a DIY project.
What Is A Skim Coat?
Skim coating is a means of achieving a smooth finish on your wall by applying drywall joint compound.
The reason for applying a skim coat is to improve or repair wall surfaces that are damaged or to go over a textured wall.
This is the most cost effective way to smooth walls that are uneven or in need of repair.
Skim Coat Application Methods
There are a few ways for a beginner or DIY enthusiast to skim coat. Professionals will use a hawk and trowel but for the rest of us a paint roller, or texture sprayer are the best options.
And you can also use a drywall knife.
Paint Roller
Using a paint roller to apply drywall compound is a quick and easy way to skim coat a wall.
The application goes on rapidly and with a lot less mess than trying to master a hawk and trowel.
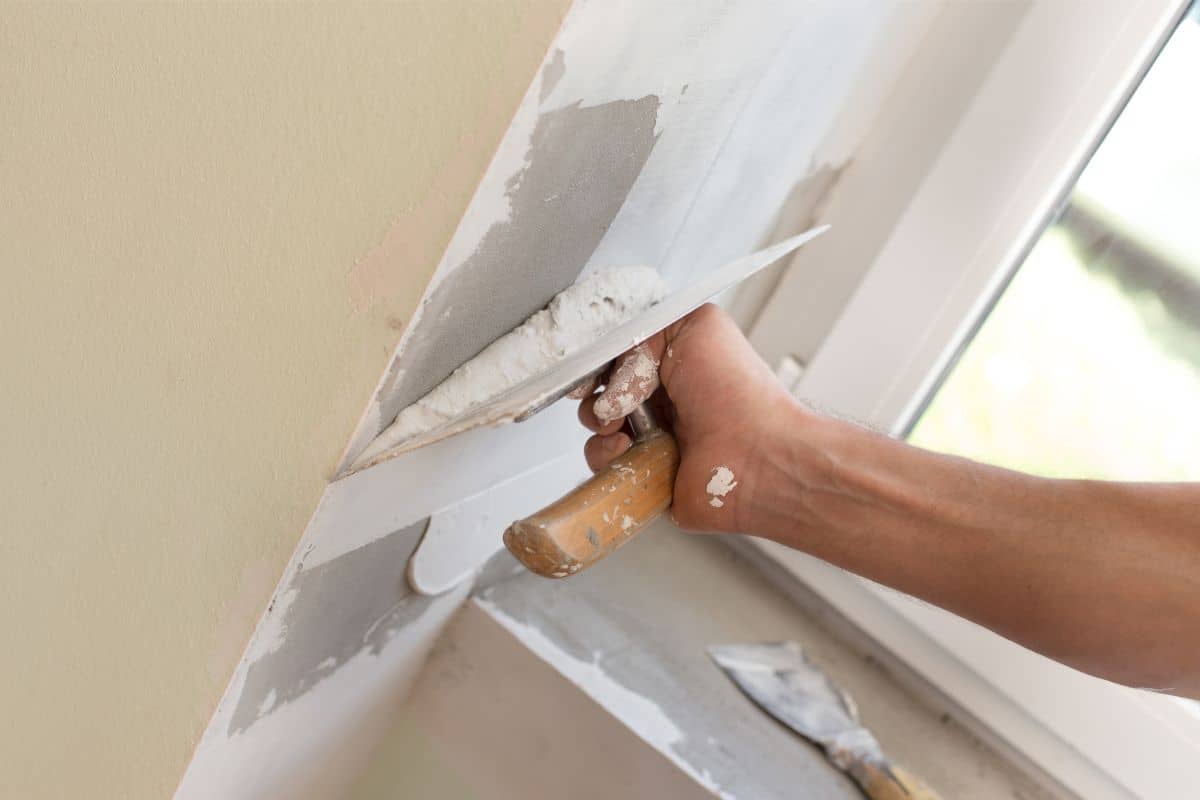
Drywall Knife
It is possible to use a drywall knife to apply drywall compound in the earlier steps.
This tool is typically used in skim coating to smooth the compound but can be used as an applicator as well to keep costs down.
Texture Sprayer
By far the quickest way to skim coat a wall is to use a texture sprayer. It’s not possible to use a normal paint sprayer for this job as the drywall compound mixture is too thick.
When you have applied the drywall compound you finish it off as you would with a paint roller or drywall knife application.
Before You Begin
As any decorator or remodeler knows, preparation is 90% of the work and if you prepare properly you will end up with a much better result.
What You'll Need
So what do you need to skim coat your walls? Below is a list of both the equipment and tools that you will need as well as the list of materials required.
Equipment Required
- Drywall knife
- Mud pan
- Paint roller frame
- Paint roller cover
- Paint roller 4- to 8-foot extension pole
- Fine-grit drywall sanding screen
- Bucket
- Paint rolling screen
Materials Required
- All-purpose drywall compound
- Water
- Painter’s tape
Instructions
Follow the instructions for an easy way to skim coat a wall with a paint roller.
Prepare The Area
Protect areas that are not being worked on. Turn off electrical circuits to light switches and outlets.
Take off faceplates and cover the switches and outlets with painter’s tape. Put down heavy drop cloths and tape them to the baseboards.
Mix The Drywall Compound
Use a lightweight drywall compound, there is no need for a heavier compound as it will have no structural purpose.
As a bonus, lightweight compound is not as difficult to sand smooth.
Mix according to the instructions, with the ratio as indicated on the packaging. It is better to have a slightly thicker mixture as it is easier to work with.
And if it is too thick you can always add more water.
Roll Out The Drywall Compound
Now you can roll out a section roughly 8 feet high by 2 feet wide. Apply pressure to the paint roller, this forces out any bubbles.
The working time will depend on the ambient temperature, airflow and the amount of drywall deposited.
Work at a consistent depth across the wall. Although the compound will be scraped off, differing depths will dry at different rates.
Working in small manageable sections is also a good idea, so it doesn’t dry too quickly before you have a chance to skim it.
Skim The First Section
With a 12 inch drywall knife skim the first section. Working in columns scrape either up or down, applying a little more pressure on the left side of the knife.
This smooths out imperfections on the left side while building a low ridge on the right.
Do not apply excessive pressure and deposit the excess into the mud pan.
Skim Rest Of The Sections
Begin the rest of the sections by making another pass overlapping the first column. Keep the pressure more to the left and this will erase the ridge that is now on your left.
By overlapping you are removing the ridges with the knife rather than trying to sand them out later.
Sand The Dried Skim Coat
Let the skim coat dry, this should take about an hour or two but can depend on the conditions.
Once you are satisfied that it is dry you can lightly sand the coat down with the fine drywall sanding screen.
Frequently Asked Questions
An uneven or damaged wall will look so much better with a smooth skim coat and covers a multitude of imperfections.
A skimmed coated wall will need to be painted as if it is left unfinished it will be prone to damage. The wall needs to be primed and sealed first and then can be painted.
Check the drying times for the drywall compound you have used and make sure to wait till it’s dry.
Yes! If the walls in your room are damaged, or have been covered with an unsightly textured finish you may want to cover all of it with a skim coat.
By applying a skim coat to the walls the whole appearance of the room can be altered.
Final Thoughts
With the easy-to-follow instructions on how to skim coat a wall I’m sure you will be able to tackle this job in your home.
Remember preparation is key and follow all instructions carefully especially when mixing the drywall compound.
I wish you a successful project and the transformation of your walls.

Hi I’m Adrienne Carrie Hubbard. I believe a rich life comes not from the things you have, but the things you do; the experiences you create and the people you meet along the way. Thanks for hanging out!