Clean, fresh baseboards brighten your home. Learning how to paint baseboards on carpet is like cracking a tough geode for brilliance. A little bit of effort results in a dazzling reward. Learning this skill will crush DIY trepidation and whisk you towards floor molding bliss.
If your mopboards are looking sad and forlorn then it’s high time to spruce them up. Motivation, method, and supplies are all you need. Ready to amaze yourself?

Freshened baseboards look fantastic.
Because they’re so close to the floor, baseboards gather dirt, dust and scuff marks. Have you ever scrubbed your home, only to be frustrated by baseboards that still look dirty?
Painting baseboards on carpet isn’t as hard as you think.
Most folks get nervous about painting near carpet. Anxiety about wrecking the flooring can get in the way of household DIY paint jobs. But fear not! You know where you want your home aesthetic to go–I’m going to help you get there…
The road to freshly painted baseboards is forked…
There are three directions that you can go:
- Remove the baseboards to paint them. This method is time consuming and risky. While it protects the carpet, there’s potential for damage to the baseboards or walls. This approach is more commonly used among professionals, or when there is no gap between the baseboard and the floor.
- Pull the carpet away from the wall. Carpeting is tacked down near the wall via a tack strip.This strip is loaded with tiny nails which attach the carpet. You can use pliers to detach these nails then peel the carpet away from the wall. This method is best suited for folks with flooring experience.
- Paint in place using a protect and cover method. With this strategy, baseboards and carpet stay where they are. Using a combination of tape, drop cloth, and cereal box to protect the carpet, you work in small sections. If you're a DIY home improver like me, I think you’ll like this method the most. We’ll circle up here, and dive into the details…
Prep work and planning come before painting.
Gathering supplies and preparing your work site is critical to success. You don’t want to go rogue here, believe me! Failure to properly prepare could result in carpet damage.
Most of the time spent on this project involves setting up, then awaiting paint to dry.
Painting Supplies:
- Painter’s drop sheet
- Painter’s tape (green or blue)
- Quality 2 ½ “ bristled brush
- Trim paint
- Cardboard from a cereal box (optional as desired)
- Floetrol paint additive (optional: makes paint easier to work with)
- Vacuum or damp cloth
- Putty knife or “5 in 1” tool
Evaluate the condition of your floor moldings.
If your baseboards are dinged or missing chunks of wood, do some quick surface restoration prior to painting. This will earn you a smoother, easier-to-paint baseboard surface, which will look better when finished. For this, you’ll also need:
Restoration Supplies:
- Soap and water or teaspoon solution
- Sanding sponge or 120 grit sandpaper
- Wood filler or spackle (such as DryDex)
Step-by-step guide to the “paint in place” strategy.
Step 1, cleaning:
Clean the baseboards with soap and water. If they're really dirty, use a teaspoon solution. Air dry.
Vacuum the floor around your work area (to prevent dust and debris from getting onto the painted area).
Step 2, filling:
Fill any small dings with a wood spackle. Fill any larger gauges with wood filler. Let them dry completely.
Step 3, sanding:
Use the sanding sponge or sandpaper to smooth the baseboard. Vacuum or wipe dust away.
Step 4, taping:
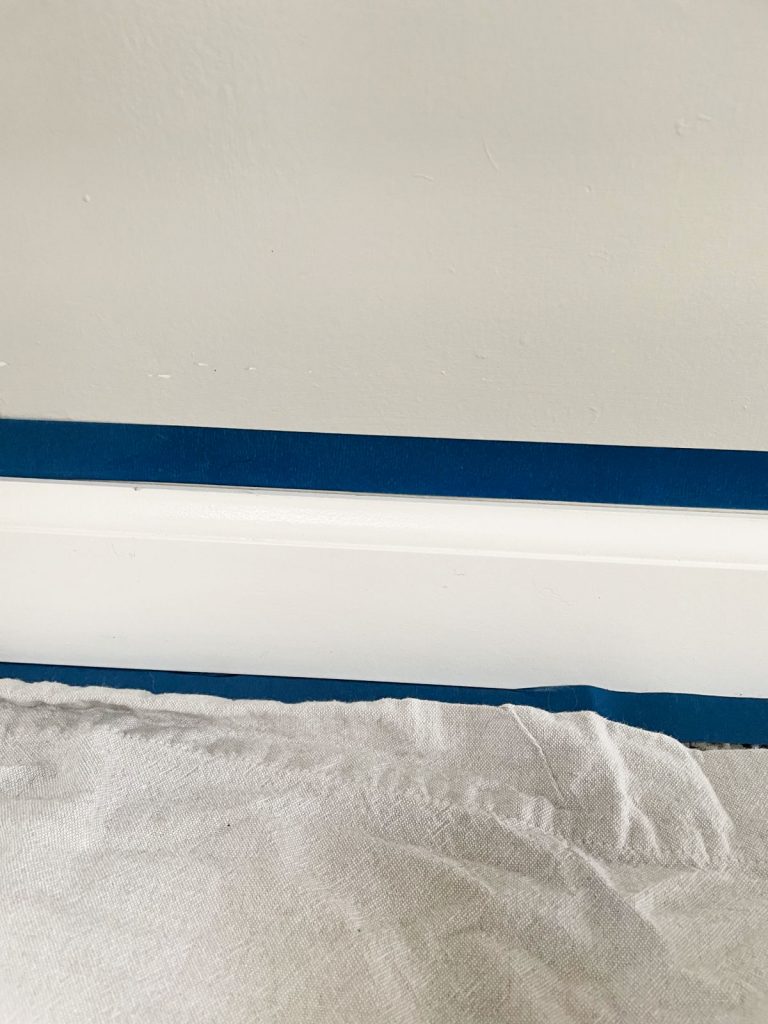
Using your painter’s tape, carefully mask off a straight edge above the baseboard. This tape will protect the wall above it.
Lay a strip of painter’s tape, sticky side down, onto the carpet. Snug the tape close enough to the wall that there’s an ⅛ “ overlap between the tape and the wall. Then, take your putty knife or 5-in-1 tool and push the tape overlap into the space between the carpet and the wall. This compresses and protects the carpet for painting ease. The tape tightly tucks into the crease.
Place a second stripe of tape next to the first, overlapping by ½ “. This widens the protected area of carpet.
Step 5, cloaking:
Cloak the carpet with the painter’s drop sheet. Ensure the sheet overlaps the painter’s tape on the carpet. The goal is to ensure the carpet is completely covered, because spatter happens 😉
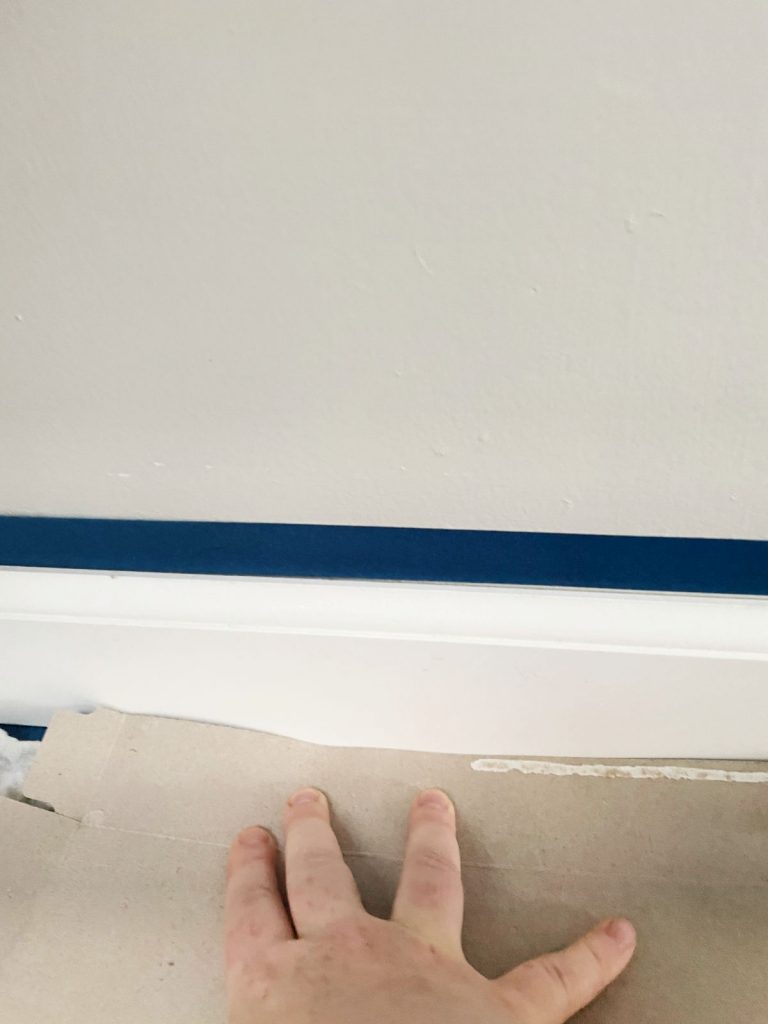
You may choose to slice the side of a cereal box, unfold it, and use this wide thin cardboard as additional protection. Slide the longest lengthwise edge into the crease between the taped floor and the baseboard.
Step 6, preparing the paint:
Open your paint can. To use a paint additive like floetrol, mix 2 ½ “ of paint and ½ a dixie cup of additive in a “cut can”. Floetrol allows the paint to cover better, look smoother, and minimize brush strokes. (Using a less full cut can is easier to maneuver than a large full can of paint).
Step 7, brush dipping:
Grab your 2 ½” high quality paint brush (You might be tempted to use a disposable brush, but a better brush is easier to work with and creates a nicer finished product). You don’t want to go with a smaller brush than this. You could go up to 3” brush, max.
Less is more. Dip your brush about ⅓ to ½ way up the bristles. Use the edge of the paint can to shear off excess paint.
Step 8, painting:
Start in the middle of the baseboard and paint lengthwise, or with the grain of the wood. As your brush gets a little drier, move up and angle your brush to cleanly sweep the upper edge. Next, as your brush now has less paint on it, move towards the base.
Remember that later when the tape is removed, the carpet will spring up to hide the bottommost edges of the baseboard.

Step 9, waiting:
Read the paint can for the recommended dry time.
Step 10, sanding before final coat:
Lightly sand off any dust or hair that may have gotten stuck in the damp baseboard paint prior to applying your final coat. (Wipe down with a dry cloth after sanding). If you are doing three coats, then lightly sand and wipe down after the second coat.
Step 11, removing tape:
After about an hour the paint should be dry to the touch. If you have finished all coats, it’s time to remove the tape. Grab the end of the tape and slowly peel it back towards itself, keeping your hand close to the wall. This is safer than ripping the tape straight out. Be cautious that you aren’t taking any wall paint with you.
Now you move to your next section of mopboard. Repeat until all sections are painted.
Stand back and prepare to be blinded…
Congratulations. You welcomed the challenge to paint baseboards on carpet! And now that the tape is ripped off, all you have left to do is…
Step 12, celebrating:
Crank up the Timbuk 3. Grab your paintbrush, tap your toes, hop around, then sing into the bristles like a mic…
“The baseboards are so bright, I’ve gotta wear shades!”
(Now take a nap, you earned it !)


Hi I’m Adrienne Carrie Hubbard. I believe a rich life comes not from the things you have, but the things you do; the experiences you create and the people you meet along the way. Thanks for hanging out!
ej says
A 6" putty knife also works (instead of the cereal box) and it's stiff edge wil lallow you to get it either under or at least up tight to the baseboard. Nice tutorial!
adrienne says
Great tip! Thanks for reading!