To maintain a healthy and blooming garden a good supply of fertilizer is needed. This is best if it is organically made by you and helps you recycle organic waste.

So I’m going to show you how to build a compost bin out of cedar planks and chicken wire. It is very simple and will take just a few hours of your time.
Types Of Compost Bin
There are several different types of compost bin and the one you choose will be the one that best suits your gardening needs.
Wire mesh compost bins are simply a cylindrical holding unit made from galvanized chicken wire. You can add posts for stability, but it can make the unit difficult to move.
A snow fence holding unit uses posts to create a square unit that supports the snow fence. While it will be secured into the ground it will be relatively easy to move it around.
Worm composting bins are typically either barrels or long rectangular boxes and are ideal for composting kitchen scraps. The worms eat through the waste and turn it into organic matter.
Heap composting is the simplest and doesn't require any structure. Garden and food waste simply piled in one spot and just needs occasional turning.
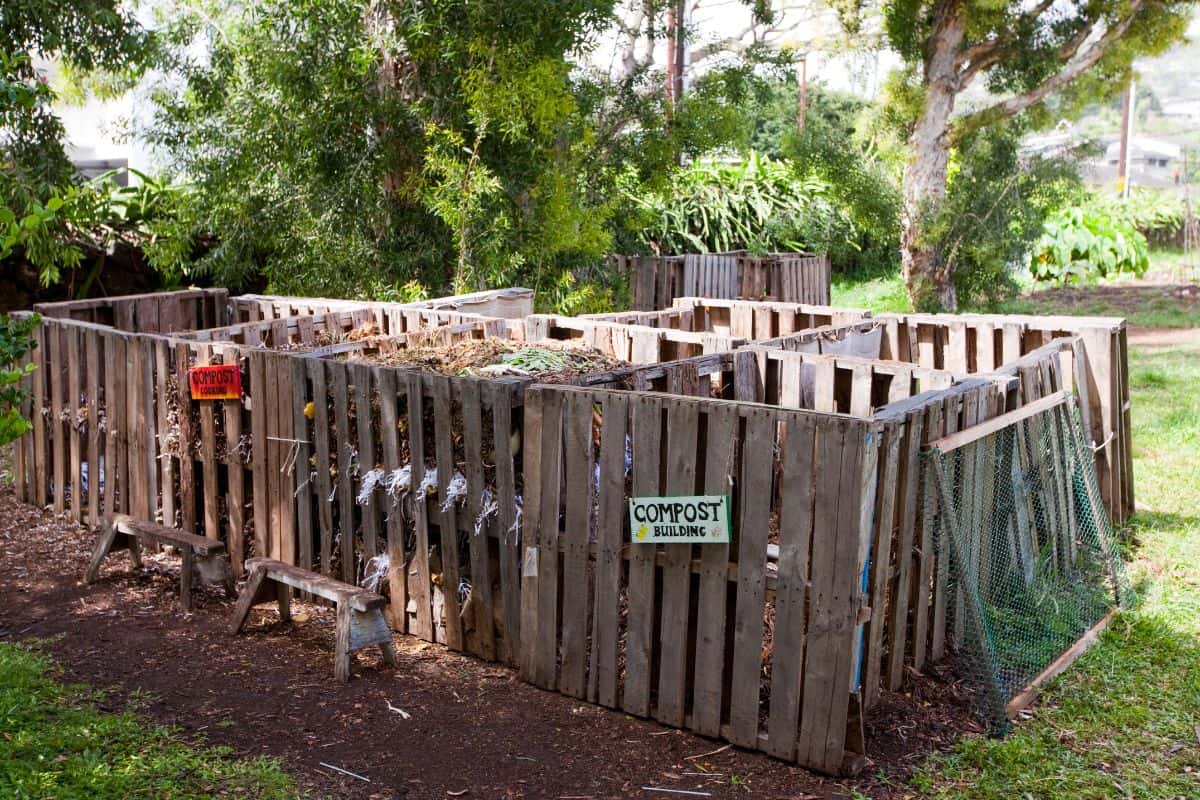
Three Bin Compost Bin System
I’m going to concentrate on a three bin system. This, as expected, involves three different containers which the compost moves through as it decomposes.
This process speeds up the creation of compost to a few weeks compared to months when the compost is just left to decompose.
It is made from durable materials with front planks that can be removed for convenience. It also allows good air circulation for speedy composting.
Tools Needed
To make this three bin compost system you will need the following tools:
- Saw
- Drill
- Measuring tape
- Box 2” wood screws
- Box 2½” wood screws
- Sledgehammer or mallet
- Staple gun and staples
Materials Needed
- 4 x 4 foot metal fence posts
- 1 roll 3 feet chicken wire
Cedar Planks Needed
- 7 pieces at 12 foot of 6” x 1”
- 9 pieces at 10 foot of 6” x 1”
- 2 pieces at 10 foot of 2” x 1”
- 2 pieces at 10 foot of 6” x 2”
- 2 pieces at 12 foot of 6” x 2”
- 2 pieces at 12 foot of 4” x 2”
Wood Cuts
- For the removable front planks, cut 4 of the 12 foot of 6” x 1” into 3’ 7 ½ “, you should have 12 in total.
- You need 8 middle and end uprights, cut from the 12 foot 4” x 2” timber into 2’ 10 ½” pieces.
- For the side slats, divide the 10 foot 6” x 1” into 4’ 6” pieces, you’ll have a total of 18.
- The 8 back and front supports are cut from the 12 foot 6” x 2” timber into 2’ 10 ½” .
- You’ll need 4 bottom pieces from the 10 foot 6” x 2” timber at 4’ 9”.
- For the plank supports, divide into 6 the 10 foot 2” x 1” at 2’ 10 ½”.
- The back slats are made from the 3 remaining 12 foot 6” x 1”.
Building The Side Panels
Put two of the side slats onto two uprights, drilling pilot holes first and attach them. Put a third slat on to complete one side panel, making sure they are evenly spaced.
Working on a firm surface fix the supports, screwing into both the uprights and the slats. Turn the panel upside down and attach the bottom pieces with the 2 ½” screws. Repeat for the other side panel.
To make the removable front panel guides, attach the planks to the side slots putting a plank in place as a measurement.
Building The Middle Panels
The middle panels are very similar to the side panels with some differences.
Turn the panels over and attach three additional side slats to the other side of each middle panel.
The back and front supports have to be perpendicular to the uprights. Fix the bottom pieces with 2 ½” screws ensuring that you are securing them into the side slats.
Like the side panels, make grooves for the removable front panels by fixing plank supports to the uprights. This needs to be done on both sides of the middle panels.
Assembling The Compost Bin
To assemble the compost bin, put the panels on their front supports. Fix the three back slats to each of the end panel’s back supports.
Calculate 49 inches from each end to gauge the correct positions for the central panels and attach them with screws to the back slats.
Put the compost bin upright on the ground where it is going to be situated. Slide four planks into each of the bins to space the supports.
Take the planks out and then hammer in the metal fence posts. Attach the metal fence posts to each of the front supports of the compost bin.
Cut the chicken wire to size and staple to the inside of each bin on the back and sides. Put the removable planks back on the front, and you’re finished!
Using Your Compost Bin
Now you are ready to use your compost bin. In the first bin, empty all your food scraps, garden waste, dry leaves and old newspapers.
Once the first bin is full, begin emptying the contents into the second bin, every couple of days adding more. Turn the compost every few days. Regularly turning will speed up the process.
You can now begin to use the third bin. By the time it is full, the second bin will be ready to be used, and the first bin will be empty.
Final Thoughts
Having your own compost is a great way to keep your garden looking healthy and beautiful. Your plants will benefit, and you will be recycling your organic waste. That’s a win all round.
I hope you have enjoyed this guide on how to build a compost bin.

Hi I’m Adrienne Carrie Hubbard. I believe a rich life comes not from the things you have, but the things you do; the experiences you create and the people you meet along the way. Thanks for hanging out!
Lisa says
I found that red pepper, black pepper, white pepper, garlic, either whole, or powdered, and any other thing I find in the kitchen that is extremely obnoxious to eat by itself can be put in a blender and sprinkled on, liberally, your plants. They don’t suffer, but the underground critters like moles, and voles, don’t like it. it’s a deterrent. It’s not a killer. It’s easily done. I do use hot sauces if they have no other ingredients that might attract critters and don’t have any salt. There are some extremely hot mustards out there that worked beautifully, as well as hot peppers (Scotch Bonnets).
adrienne says
Good idea! I’ll try that thanks!