Add some holiday cheer to your front porch with a DIY doormat made with a coir door mat, acrylic paint, a Cricut machine, and an SVG file from Creative Fabrica. This project is a fantastic way to enhance your e Christmas curb appeal and showcase your unique style.

Creative Fabrica is a digital platform with over 14 million designs, fonts, SVG files and more for a variety of DIY crafting projects including Cricut crafts, papercrafting, scrapbooking, die-cutting and more.

Watch the video below to learn how to make this festive doormat and gain inspiration to elevate your front porch this Christmas, all for FREE with Creative Fabrica. Alternatively, keep reading below for step-by-step instructions.
Materials Needed:
- Plain coir door mat
- Acrylic Paint in red, white, green and black
- Black permanent marker
- Paintbrushes
- Painter's tape
- Cricut Explore 3 or similar cutting machine
- Removable vinyl for your cutting machine
- Standard grip cutting mat
- Weeding tool
- Transfer tape
- Santa Stop Here file from Creative Fabrica
- Computer with design software (e.g., Cricut Design Space)

Step 1: Choose Your Design
Visit Creative Fabrica and choose from over 14 million digital assets. Select a design that suits your taste and fits the dimensions of your doormat. I chose the Santa Stop Here file. Download the file to your computer.
Step 2: Prepare the Doormat
Shake your mat to remove loose fibers. Gently vacuum it and run a lint brush across it to prepare it for painting. Lay your doormat on a flat work surface.

Step 3: Design in Cricut Design Space
Open Cricut Design Space on your computer. Upload the SVG file you downloaded from Creative Fabrica. Adjust the size of the design according to your doormat dimensions. Once satisfied, click "Make It."

Step 4: Load Removable Vinyl into Cricut
Place the removable vinyl onto the standard grip cutting mat. I used the Cricut Explore 3 with Smart Vinyl so I did not need to use a cutting mat with my materials. Load the vinyl into your Cricut machine and follow the on-screen prompts to cut the design. After cutting, use the weeding tool to remove the excess vinyl. Because we are creating a stencil, you will be weeding in reverse, removing the main design so that only the background remains on the backing.

Step 5: Apply Transfer Tape
Cut a piece of transfer tape slightly larger than your design. Carefully place the transfer tape over the vinyl design. Smooth out any bubbles with a scraper tool.
Step 6: Transfer the Design to the Doormat
Position the transfer tape with the vinyl design onto the doormat. Press down firmly, ensuring good adhesion. Slowly peel off the transfer tape, leaving the vinyl design on the doormat.
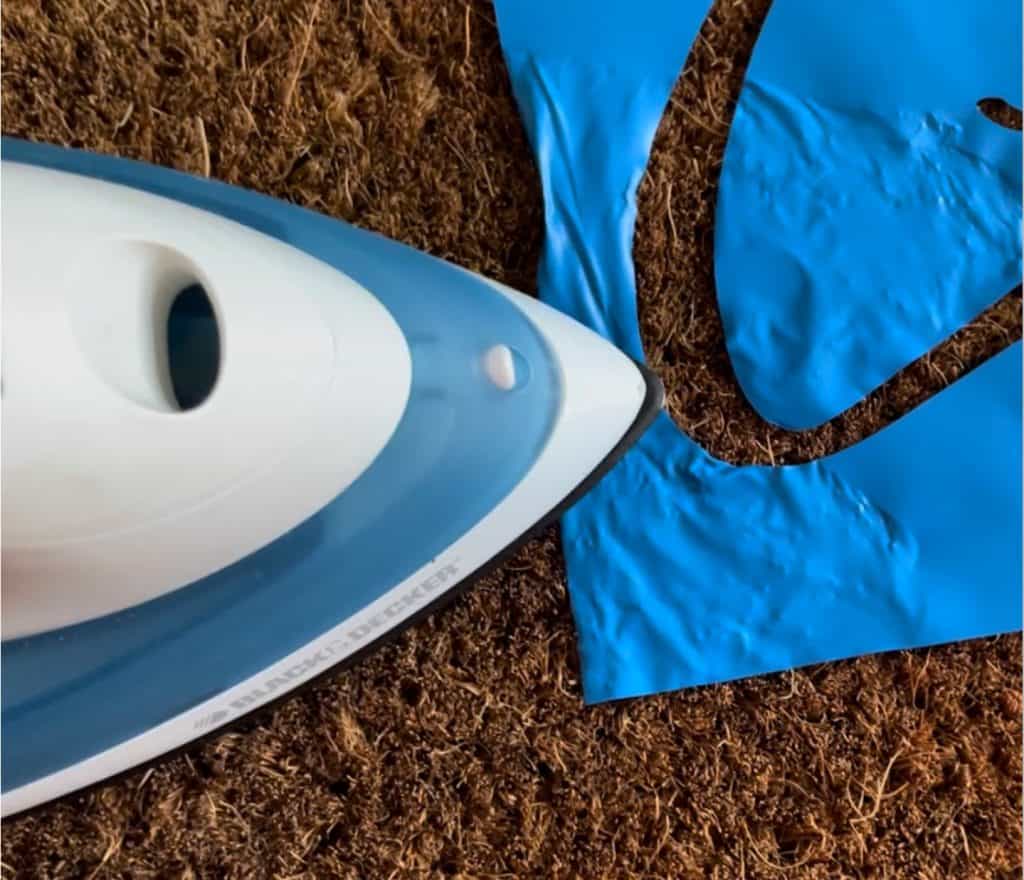
Step 7: Iron the Stencil in Place
Coir mats can be difficult to stencil on because nothing really sticks well to the fibers. In order to get the vinyl stencil to adhere better, gently iron it into place. Heat your iron on the “nylon” setting and press it over the stencil. This will cause it to slightly melt into the coir fibers, sealing into place. It will still be easy to remove when you are done painting and will peel off.
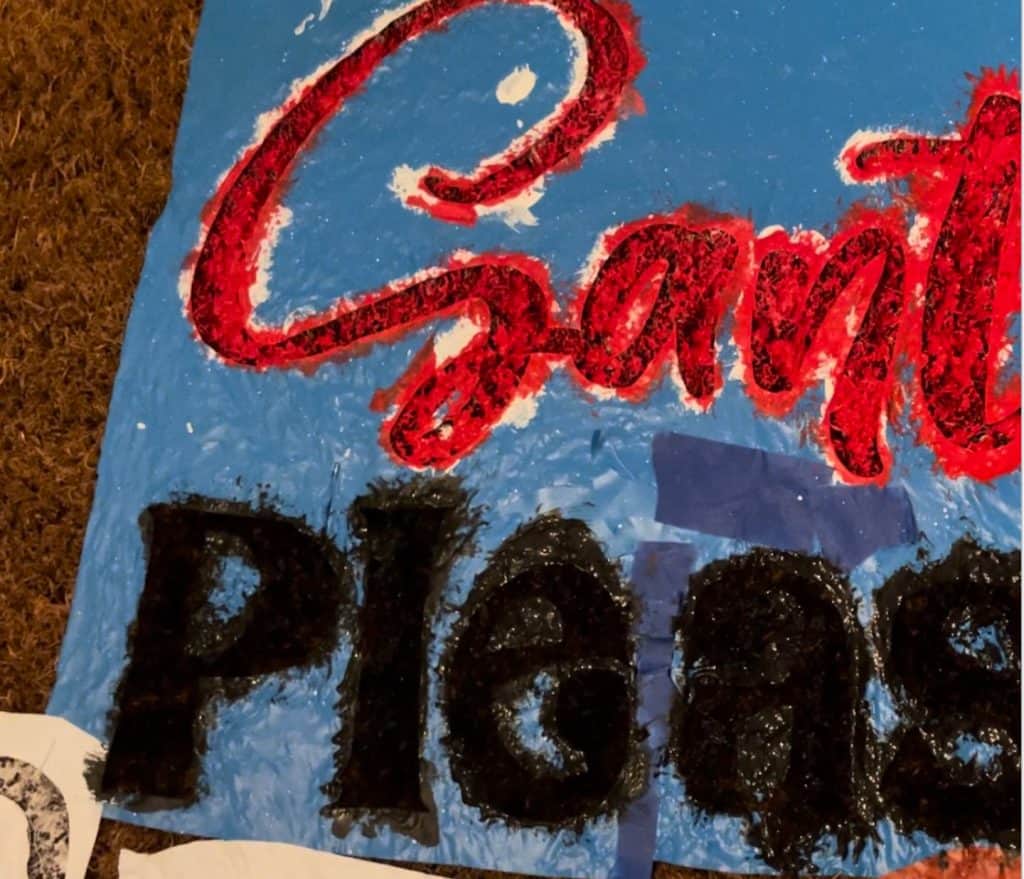
Step 8: Paint the Design
Using acrylic paint and paintbrushes, carefully paint the vinyl design onto the doormat. Use a dabbing motion and press the paint into the fibers. Start with white paint on any areas that will be painted with colors like green or red. Using white as a base coat really helps the colors pop. Once the white is completely dry go over it with the colored paint. You do not need to do this when using black paint.
Step 9: Remove Vinyl Stencil
Once the paint is dry, carefully peel off the vinyl stencil from the doormat. This will reveal your personalized design.
Step 10: Touch Up
Inspect the design and touch up any areas that may need additional paint.

Step 11: Outline with Black Permanent Marker
Outline the areas you want to stand out more with a black permanent marker.
Step 12: Let It Cure
Allow your DIY doormat to cure for at least 24 hours before placing it outdoors.

A colorful Christmas doormat will give your home a cheerful look for the holidays. You can get the Santa Stop Here SVG, as well as the other digital assets shown in the video, with Creative Fabrica’s All Access Subscription.
For those of you who do not have Creative Fabrica's All Access Subscription, Hometalk has got a great deal for you where you can try it out for FREE with the All Access Trial. The free trial gives you instant access to Creative Fabrica’s library of over 14 million fonts, graphics, crafts and more - commercial license included.
Sign up for free using this link and download 10 designs and fonts of your choice for free! The trial will renew at a discounted price of $9/ month ($29/ month originally) one month after your trial starts or upon using your 10th download credit.If you upgrade to the Yearly All Access billing, the price is 4.99 per month, billed annually. That is 45% more affordable! What will you create with your All Access Subscription?
Other Digital Assets from Creative Fabrica Used In the Video and Tutorial:
This is the third in a series of posts brought to you by Creative Fabrica and Hometalk. Check out the Spook-tacular Halloween SVG Layered Art tutorial and the Colorful Coasters and Thanksgiving Tablescape Inspiration tutorial!

Hi I’m Adrienne Carrie Hubbard. I believe a rich life comes not from the things you have, but the things you do; the experiences you create and the people you meet along the way. Thanks for hanging out!