DIY shiplap is an easy home decor project that can transform and entire room in just a few hours. This tutorial will show you how to install a diy ship lap wall in your home using real thin wood planks. Peel and stick wood planks are adhered to an accent wall in the bathroom for a rustic modern decor transformation.

DIY Shiplap Wood Plank Walls
Big thanks to Stikwood for supplying the materials for this blog post.
Hey Gnomies,
I just finished the latest DIY project in my bathroom. As you may remember in my recent post about my Gold Toilet I have been planning to renovate my master bathroom for some time now. I'm kicking off my bathroom reno with a DIY shiplap tutorial.
Check out the finished renovation project here and check out the video tour below:
On the to-do list is painting the walls, replacing the vanity, adding new floors and fixing some holes in the walls etc. Basically the only thing that is staying as-is is the shower.
I just finished the first part of this project which is the diy shiplap accent wall.
What the heck is shiplap?
Shiplap is a type of wood board that is installed horizontally on walls. It's often used for constructing sheds or barns and is often used on the interior of cottages and farmhouses to achieve a rustic, cozy look. The shiplap trend has exploded over the past couple of years with many DIY options available for homeowners who want to get the look for less.
I love the look of shiplap walls like Joanna Gaines uses often on Fixer Upper and wanted to do wood planking on the far wall of the bathroom with the window. I was thinking about using peel and stick vinyl plank flooring like I had seen on other blogs but then I came across Stikwood. They make peel and stick wood planking out of real wood!
They have so many styles to choose from, like Weathered Wood, but I chose the Minimalist Fir style to go with my farmhouse bathroom makeover.
Supplies for DIY shiplap wood plank wall
- Stikwood wood planking
- Saw, like a chop or jig saw (see what I used below)
Directions for installing DIY shiplap
Before I started, I ripped off all the molding and trim and quickly applied a coat of primer on the wall. The bathroom was sea foam green previously which I loved but it didn’t go with the undertones of the wood.
Instead I used Marshmallow White from Behr on the walls. We had about 3 gallons left from painting our house last summer. I applied primer under where the planks would go. If there were any tiny gaps between the boards, I didn’t want any green peeking through anywhere.
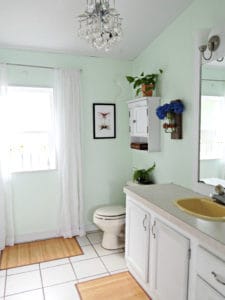
After the primer dried for a few days it was time to apply the planks. Theses wood planks are super thin and measure only 3/16”. They are light and have adhesive on the back. Simply peel off the paper from the adhesive and apply it to your wall.

I started at the top of the wall and applied the planks in rows. I used a level to make sure everything was being installed evenly and then trimmed pieces as needed with an oscillating multifunction power tool.
You can use pretty much any type of saw (miter, chop, jig) as long as the teeth are fine. The planks come pre-cut in varied lengths but you will probably have to trim some pieces a little bit so they fit perfectly on your wall. Because the panels are pre-cut to several different lengths, installation goes really fast. The only cutting you have to do is on the end pieces.
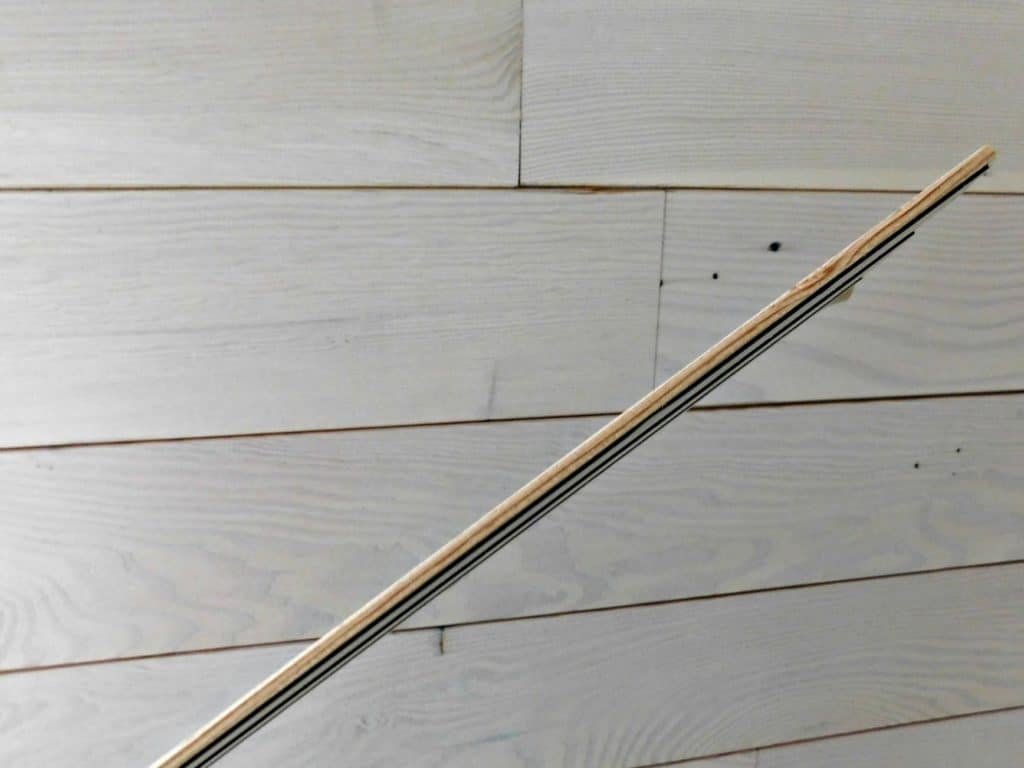
After you apply, use a J roller to apply even pressure to the planks.The type of adhesive on the back of the planks is pressure activated. A J roller is a heavy piece of rubber attached to a handle.
Roll it over the planks after they are adhered to the wall to apply pressure evenly over the wood. This helps the adhesive stick- and yes it does stick very, very well. This is considered a semi-permanent installation. If I wanted to pull these off I would have to pull very hard. I’m not worried about them coming loose at all.
I know what you’re thinking, “Adrienne, is it okay to but these planks up in the bathroom where there is lots of moisture?”
Yes, yes it is. Before I started installing I made sure no one used the shower in this bathroom for a couple of days. Ditto with after installing. It's important to be sure that your wall does not currently exceed 9% moisture content before installing. If possible, let your walls dry out for a couple of days before installing and after installing.
It's important that you allow the material to acclimate outside of the box and unwrapped for 48 hours. Be sure to also use a J roller during installation to ensure proper adhesion for each plank.
These planks don’t need to be sealed and to clean I can use the dust attachment on my vacuum and wipe them down with a cloth (see also 'How To Clean Velcro').
Installing the planks, including cutting some of them only took me two hours. I got everything done while my daughter was at preschool.
After the planks were installed. I purchased some trim for the window, baseboards and to cover the gap at the ceiling. All I have to do is apply a little wood filler over the nail holes in the window frame and I’m done.
You may also like: Lovely Laundry Room Makeover

Installing a plank wall like this one can easily be done in a weekend.
FYI: I didn't attach the bottom piece of trim yet. It's just placed there so I can see how it looks. I also laid out the bricks to play around with the pattern. I will be working on the flooring in a couple of weeks.
What do you think of my planked wall? Let me know in the comments. Next I will be replacing the floors and vanity so check back to see what I did with those projects or follow me on Instagram to see what I'm up to. Have you installed shiplap or a wood planked wall before? Let me know about it in the comments!


Hi I’m Adrienne Carrie Hubbard. I believe a rich life comes not from the things you have, but the things you do; the experiences you create and the people you meet along the way. Thanks for hanging out!
Ekta Kapoor says
Your husband must so proud of you. you come in so handy with creative stuffs AROUND the home. I'm in awe. Your tips too are wonderful and amazing. Thank you for those.
I would have to stick around your blog a little longer to learn more.
adrienne says
Thank you so much!