Black-Eyed Susans (Rudbeckia) are stunning, resilient perennial flowers that add a burst of vibrant color to any garden. If you have these cheerful blooms in your garden but want to move them to a different location or share them with friends and neighbors, transplanting is the way to go. In this guide, we'll walk you through the steps for successfully transplanting Black-Eyed Susans, ensuring they continue to thrive in their new home.

When to Transplant
Transplanting is best done during the plant's dormant season, which occurs either in late fall after the first frost or early spring before new growth emerges. Avoid transplanting during the hot summer months, as this can stress the plants and reduce their chances of survival.
Supplies Needed
- Garden spade or shovel
- Pruning shears or scissors
- Watering can or hose
- Garden gloves
- A new planting site with well-draining soil
- Mulch (optional)
- Fertilizer (optional)
Step-by-Step Guide to Transplanting Black-Eyed Susans
Time needed: 30 minutes
How to Divide Black Eyed Susans
- Choose a new location:
Select a new spot in your garden that receives at least six hours of sunlight per day and has well-draining soil. Black-Eyed Susans thrive in full sun, so choose a location that provides adequate light.
- Prepare the new dig site:
Dig a hole in the new location that is slightly larger than the root ball of the Black-Eyed Susan you intend to transplant. Ensure the hole is deep enough to accommodate the roots comfortably. A general rule is to make the hole twice as big as the root ball.
- Water the Plant
A day or two before transplanting, thoroughly water the Black-Eyed Susan. This helps to hydrate the plant and makes it easier to remove from the ground.
- Dig Up the Plant
Dig Up the Plant: Carefully dig around the base of the Black-Eyed Susan, keeping a reasonable distance from the plant to avoid damaging its roots. Use a garden spade or shovel for this task.
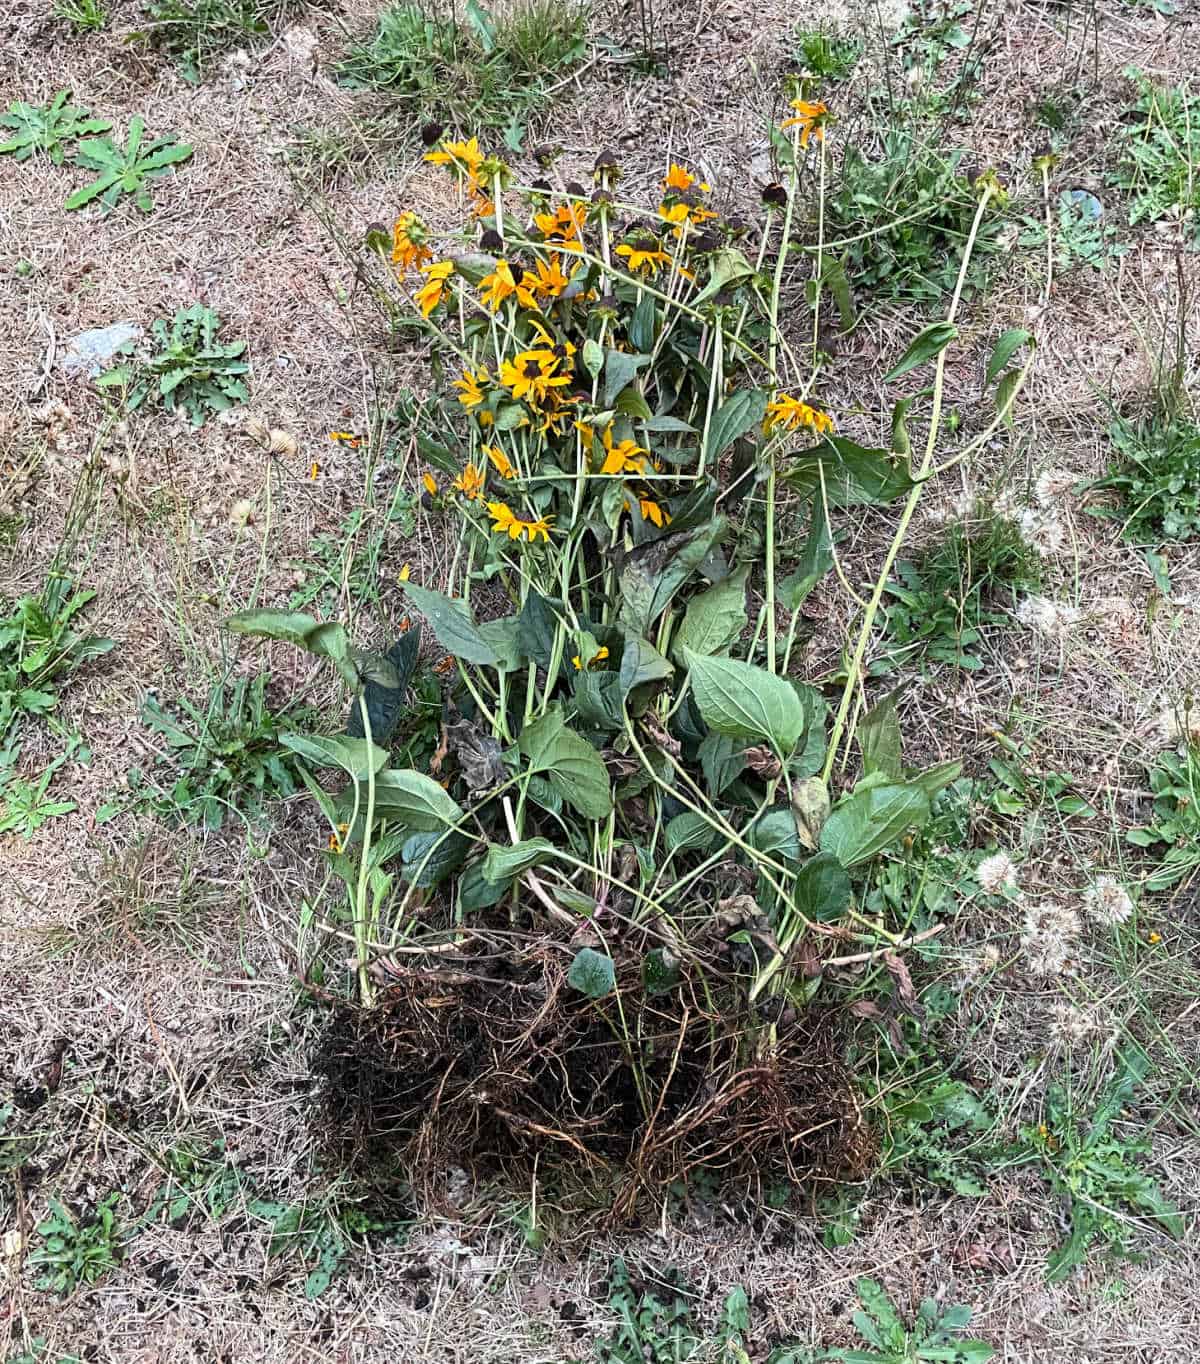
- Remove the Plant
Gently lift the plant out of the ground, taking care not to disturb the roots too much.
- Prepare the New Hole:
Fill the hole with wather. Place the plant in the prepared hole in the new location. Fill any spaces with soil, gently patting it down.
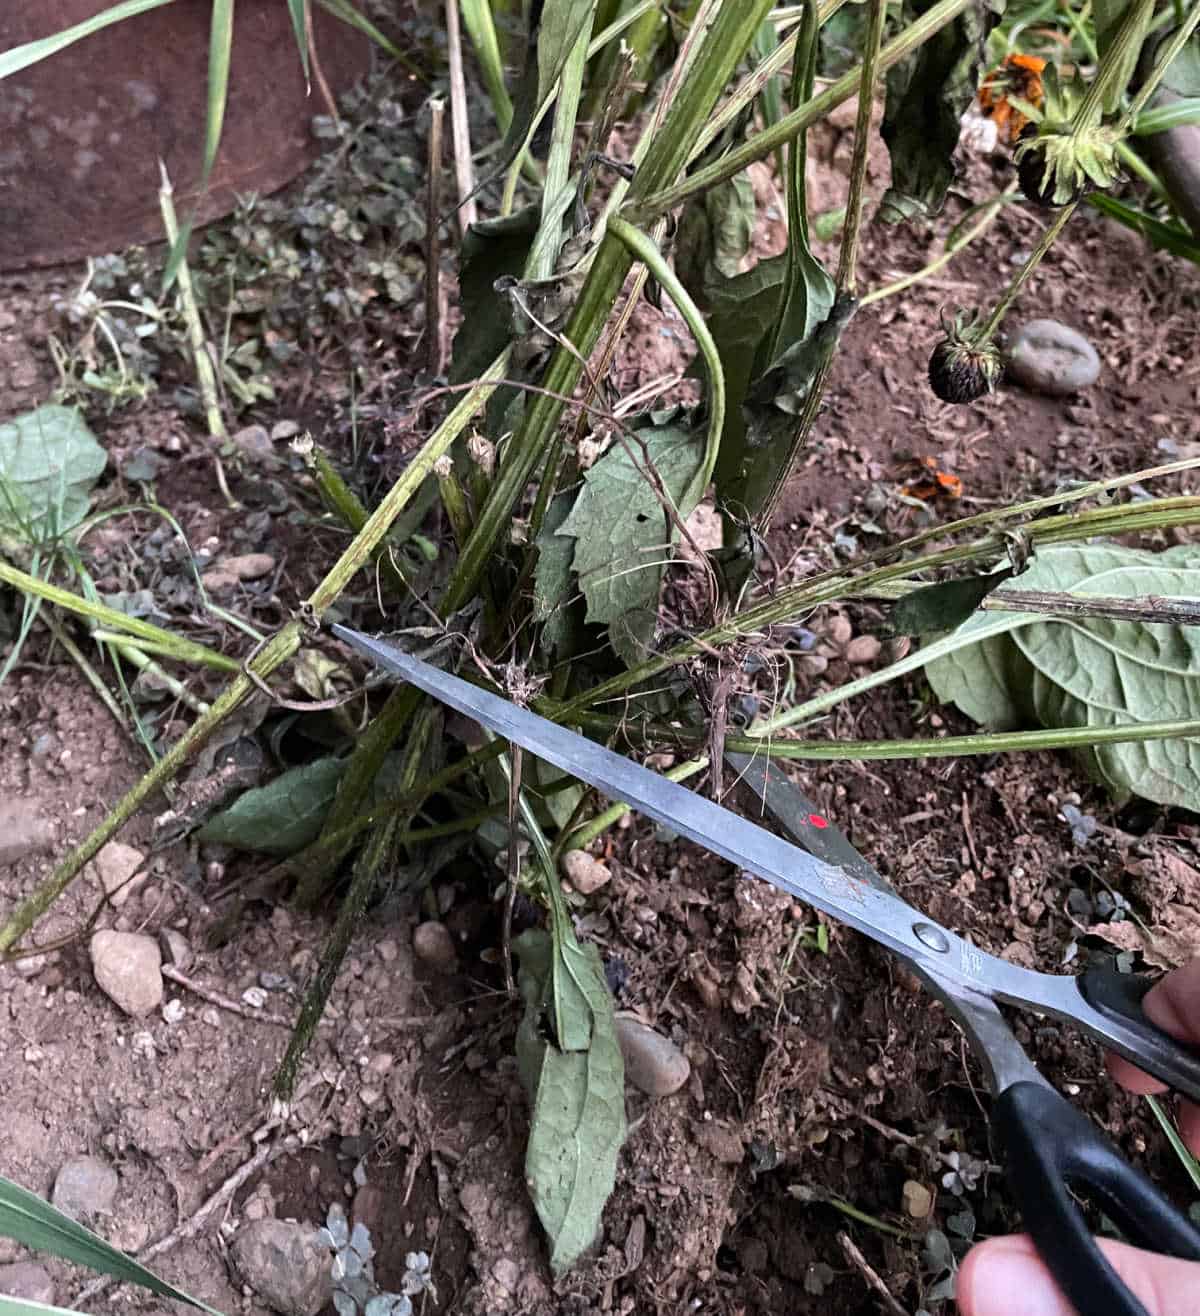
- Trim the plant
Cut the plant back to about 2-3 inches to help promote root growth.
- Water Thoroughly:
Give the transplanted Black-Eyed Susan a thorough watering to help it settle into its new home. Be sure to keep the soil consistently moist for the first few weeks after transplanting to help the plant establish itself.
- Apply Mulch (Optional):
To retain moisture and suppress weeds, you can apply a layer of mulch around the base of the plant. This also helps to regulate soil temperature.
- Fertilize (Optional):
If your soil lacks nutrients, you can apply a balanced, slow-release fertilizer according to the manufacturer's instructions. Avoid over-fertilizing, as this can harm the plant.

Black Eyed Susans are Deer Resistant
If you have deer wandering through your property on a regular basis you’ll be happy to know that Rudbeckia are deer resistant. Because they are covered in tiny hairs, deer and rabbits would rather snack on other foliage.
What is the Meaning of Black Eyed Susans?
Black Eyed Susans symbolize encouragement, motivation and endurance. They have been associated with justice in many cultures. There are also symbols tying Black-Eyed Susans to childhood and the joys of having an overactive imagination and a sense of awe and innocence. In Native American cultures, they were used to treat various ailments and were sometimes worn as a form of protection.
Can you eat Black Eyed Susans?
Although Black-Eyed Susan is not considered toxic, no parts of the plant should be eaten. The seeds are poisonous and are not recommended for safe consumption.
Final Thoughts
Transplanting Rudbeckia may seem intimidating at first, but with the right timing and careful handling, you can successfully move these beautiful flowers to a new location in your garden or share them with fellow gardening enthusiasts. By following these steps, you'll ensure that your Black-Eyed Susans continue to thrive and brighten up your outdoor space for years to come and if you happen to have cedar trees that have been dead why not try to paint them so they look green again.
FAQ
The best time of year to do this is early spring, just as the new growth starts to emerge. Dividing in the fall is best done after blooming, before the plant goes dormant. Dig up a clump and break off chunks of plants. Make sure to keep as many roots attached as possible.
You shouldn't divide it in the summer when the weather is too hot, nor in the winter when the plant is already dormant.
Cut them back to 2 inches above the ground at the end of the season. Add mulch during cold months to keep them from freezing before spring. Black-eyed Susan propagates from underground rhizomes, so if you want to keep them from becoming invasive divide the plant when it gets to large and trim back growth.
Black-eyed Susans don't require additional fertilizing during the growing season. In fact, too much fertilizer can create week stems that tend to flop.

Hi I’m Adrienne Carrie Hubbard. I believe a rich life comes not from the things you have, but the things you do; the experiences you create and the people you meet along the way. Thanks for hanging out!